Selasa, 04 November 2014

Makanan Enak Tanpa Nasi

Oke, ini dimulai jumat lalu saat gue demam dan gak bisa masuk sekolah. Karena sakit nafsu makan gue jadi berkurang, badan lemes dan maunya yang aneh-aneh. Tiap malem kebangun karena badan gaenak banget + laper karena gak makan seharian. Setelah minum obat badan gue pulih kembali tapi gak bisa bali tidur lagi. Gue mau makan tapi dirumah cuma ada nasi dan beberapa lauk pendamping. Karena gue masih dalam keadaan sakit mulut gue gak pengen nelen apa2 teruta NASI. Sumpah... gue bosen banget makan nasi. 6 tahun SMP SMA disekolah makan nasi, dirumah makan nasi, di restauran kalo lagi sama ortu disuru makan nasi. Siapa sih yang gak bosen? apa lagi gue sekarang sakit mana boleh makan makanan selain nasi. Huft.... Lo tau kan perasaan gue sama nasi kayak gimana? demi apa deh bosen banget.. sama bosennya kayak nonton sinetron-sinetron di TV yang mainstreamnya luar biasa.

Sejak malam itu, karena gue lapernya minta ampun dan gue gak boleh makan makanan selain nasi. Gw ikhlasin untuk cuma ngeliat foto-fotonya di internet. Dan itu malahan membuat gue tambah laper. Dari pertapaan yang gue lakuin di internet tiap malem gue terpana ngeliat beberapa makanan yang enaknya tuh pake banget (menurut gu loh ya...) tentunya gak pake nasi.

1. Mie Kuah Indomie
http://mympbackup.files.wordpress.com/2010/06/indomierebus.jpg 
Serius deh? Siapa sih yang gak suka makan mie instan? Terutama bagi orang sakit makanan berkuah bakal ningkatin nafsu makannya berlipat-lipat. Apalagi ditambah telor and Sayur Hijau + Cabe.... Mie kesukaan gue itu mie indomie soto, rasa kuahnya itu nendang banget!!!
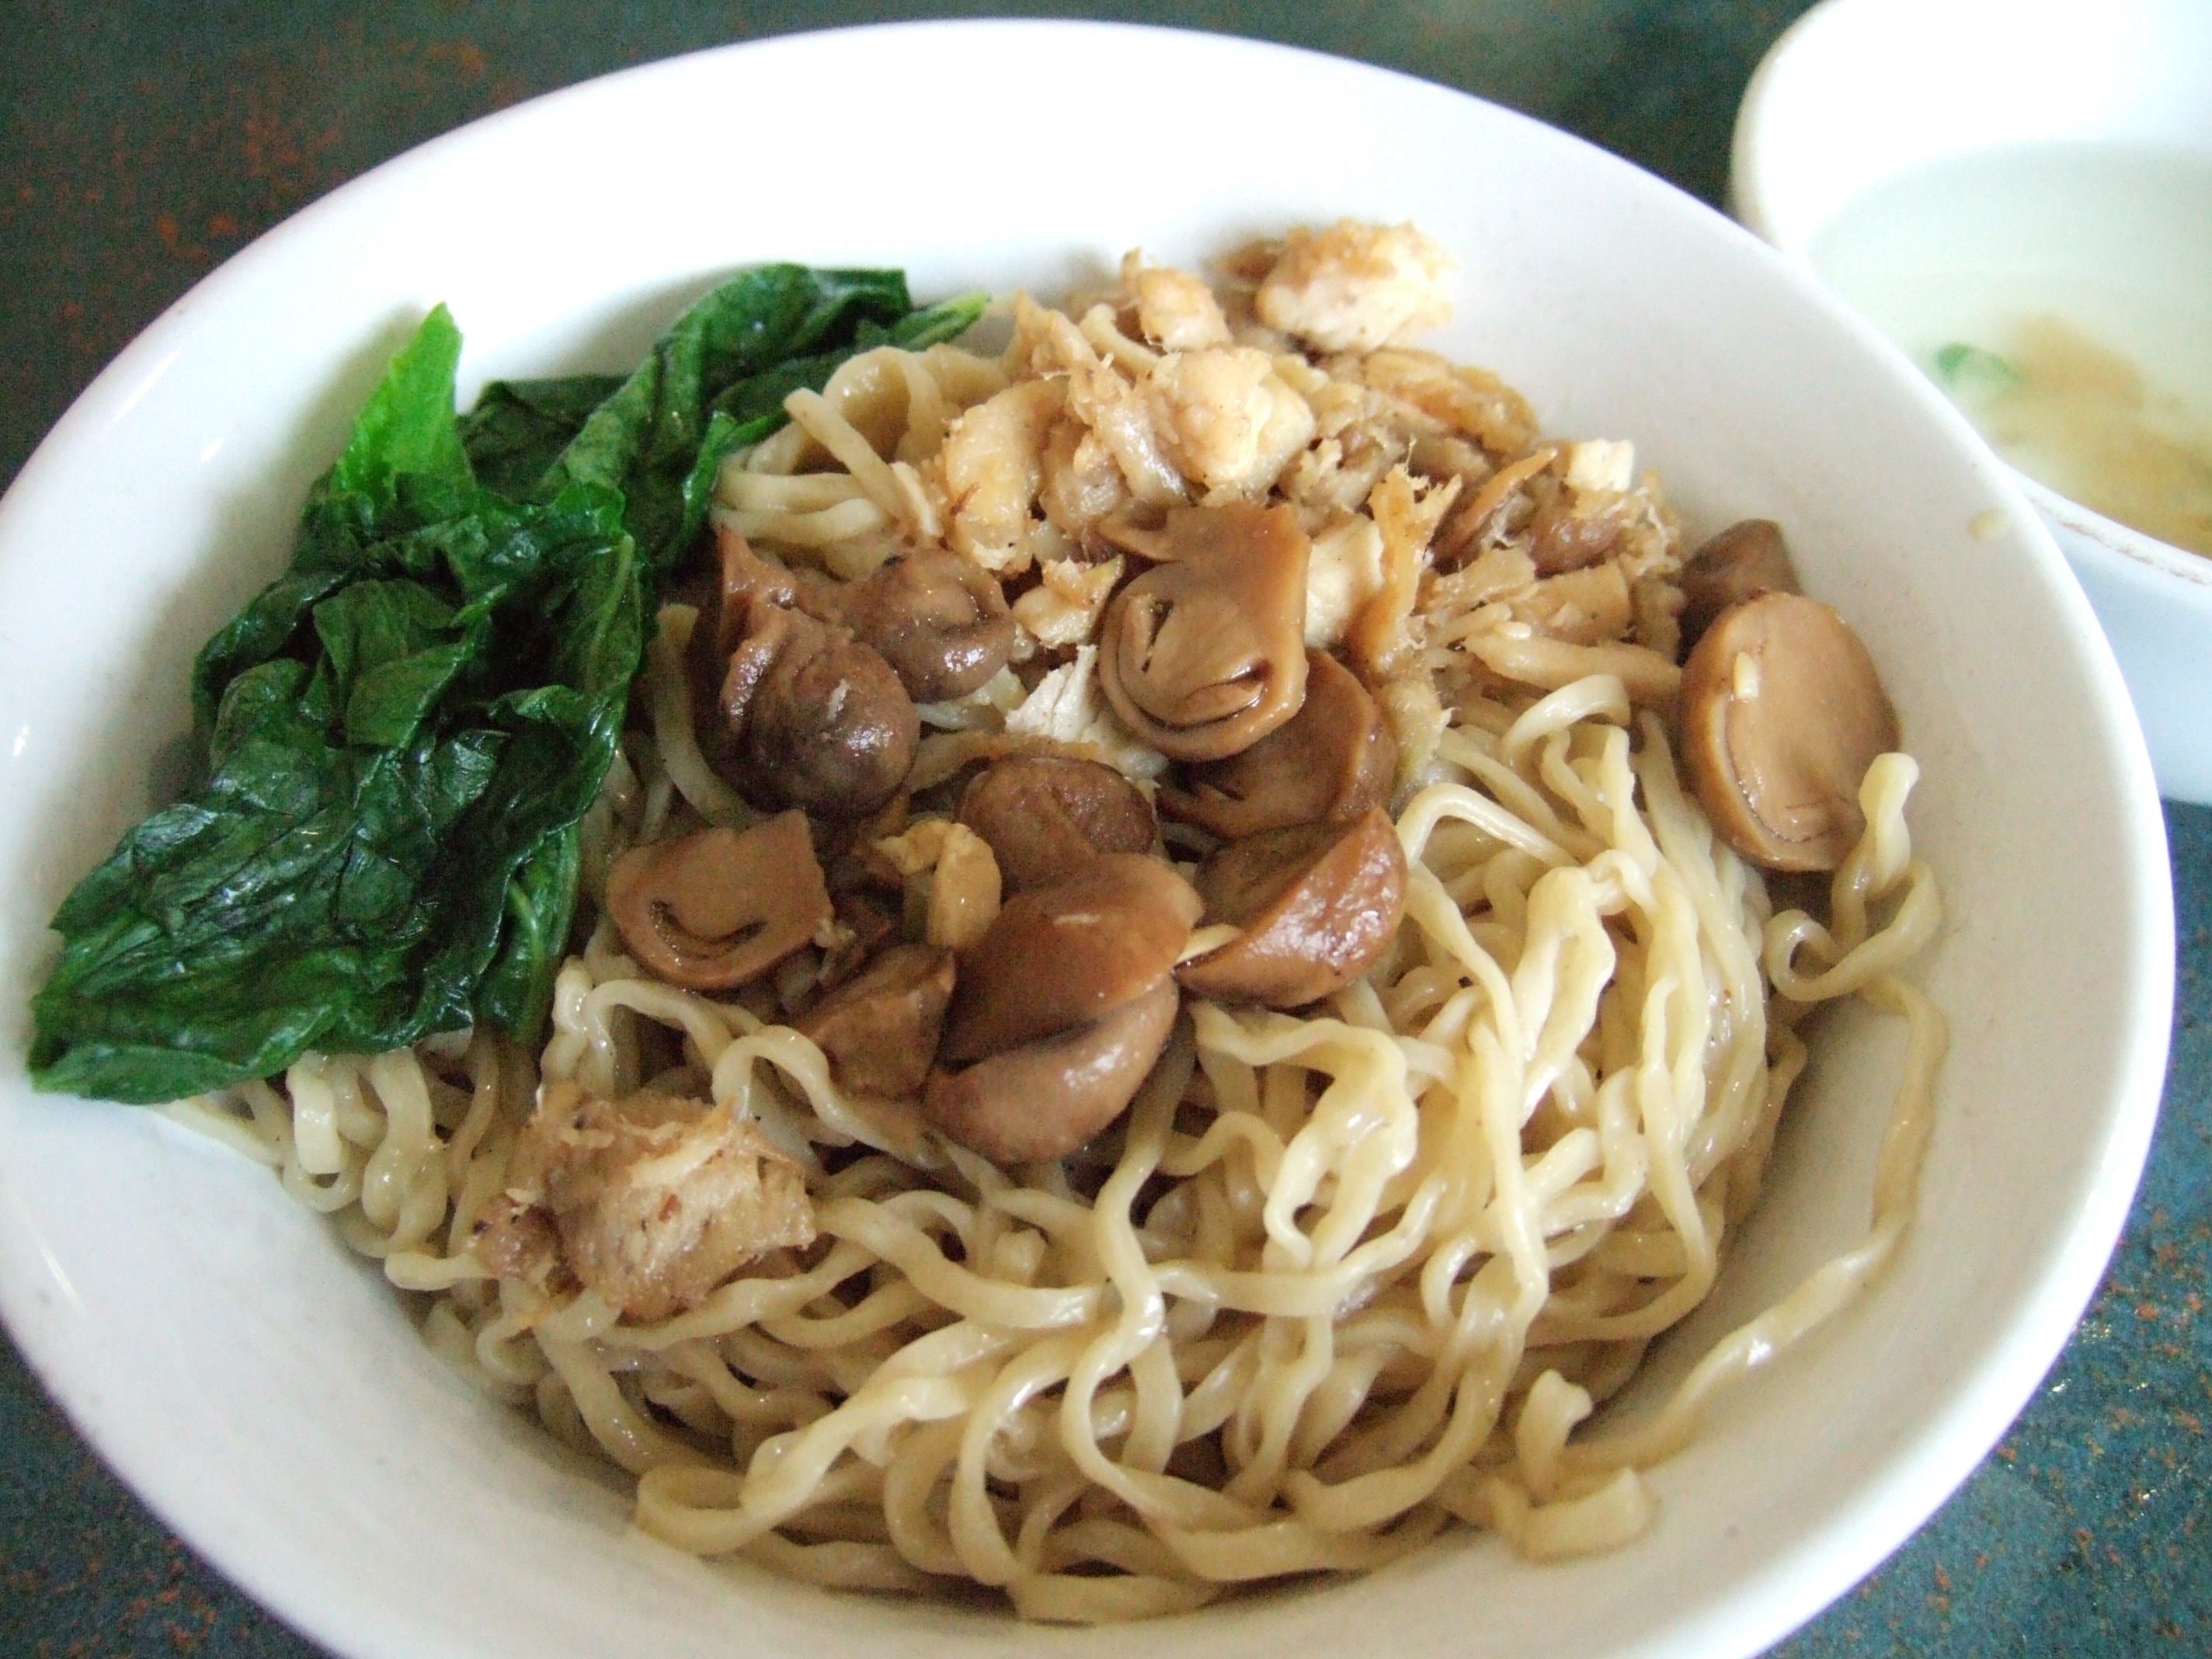

2. Mie Ayam
http://upload.wikimedia.org/wikipedia/commons/8/82/Mi_ayam_jamur.JPG
 Ini kayaknya gak usah dijelasin pakai kata-kata lagi deh. Walaupun gak sehat tp tetep aja ini jd makanan favorite. Mie ayam fav gw tu yang ada di depan G.O Gunung Agung, Mie ayam deket SD Saraswati 4 + MIe ayam Surabaya Sudirman.

3. Sop Ayam Pak Min Klaten
Pernah nyobain sop ayam Pak Min Klaten gak ?  Buat yang blom, cobain deh sekali2. Ini enaknya dimakan pas lagi hujan. Ini udh buka cabang banyak di denpasar. Aku belinya sih yang di jalan Gatot Subroto.

4. Waroeng Steak and Shake
http://santapjogja.com/wp-content/uploads/2014/03/wpid-waroeng-steak-and-shake-bisnis-waralaba-laris-manis-11.jpeg
Ini yum + murah.

5. Bakso
https://c1.staticflickr.com/5/4147/5056259352_57af4ee6e4_z.jpg 
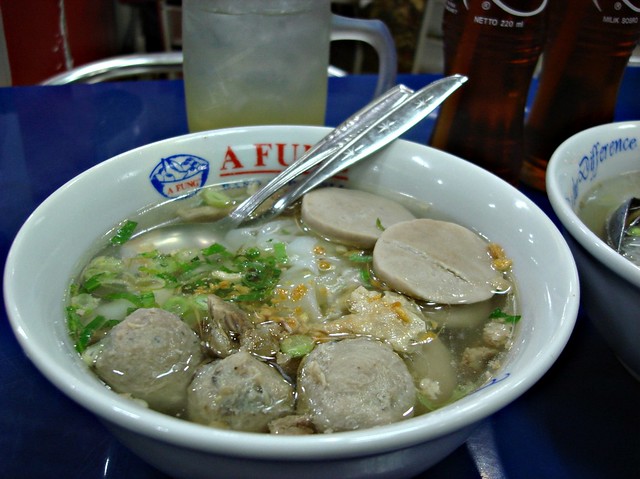
Hayo? siapa yang udah ngiler?? kuahnya itu lo... sesuatu banget... kol ditambah baso jd ada tekstur crunchy gimana gitu.... :9 ditambah lagi minumnya teh botol sosro...

6. Sup Asparagus
 
Huft.. pas lagi hujan atau badan lagi kurang enak kalau makan sup asparagus nafsu makan pasti nambah deh. Satu panci pasti ludes... apalagi ditambah bumbu pedasnya... glup glup glup

7. Rujak
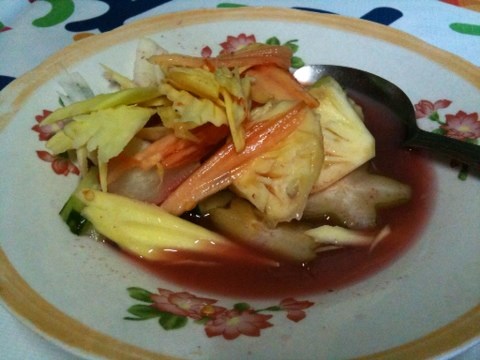
Oke rujak. Ini enak banget. Apalagi dimakan pakai mie soba. Rasanya asem manis gimana gitu. Favorit sih rujak kuah pindang. Tempat favorit yang ada di jalan arjuna + deket rumahnya yugek.
8. Lumpia
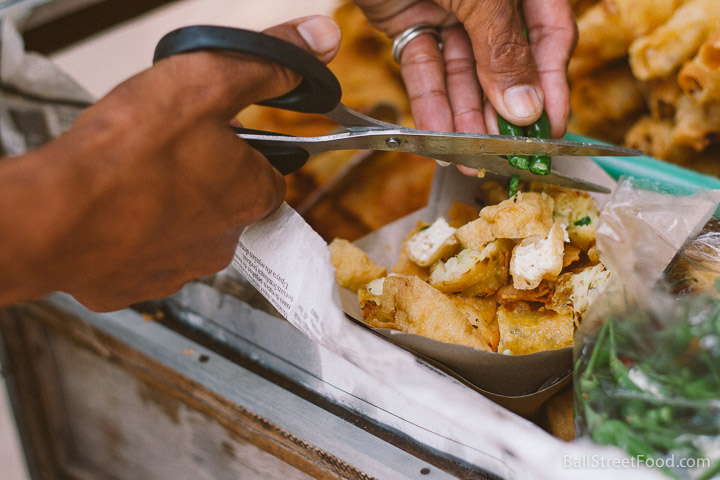
 

Buat kamu-kamu yang lagi jalan-jalan ke pantai, khususnya sanur. Cobain deh lumpia disana, enak banget....... aku sih biasanya beli di renon tapi sekarang udah gak ada lagi. Gak tau kenapa lumpia yang di suwun lebih enak dari pada yang di restaurant.


Oke deh, sekian dulu review makanannya. Kalo ada yang mau nambahin comment aja di bawah ;) khususnya makanan luar pulau Bali! ;)

Jumat, 19 September 2014

TUGAS 2 (BIODATA)


Nama : Shita Devani
Panggilan : Tata
TTL : Denpasar, 21 Juni 1997
Alamat : Jalan Gatot Subroto 1A
Hobby : Travelling, tidur, nonton tv
Cita- cita : Pilot
Riwayat Pendidikan :

SD : SD Saraswati 4
SMP : SMPN 2 Denpasar
SMA : SMAN 2 Denpasar (XII IPA 1)
Makanan fav : Mie Ayam
Umur : 17yo
Gol.darah : B
Sosmed :

Facebook : Shita Devani
Twitter : @shitadevani
Instagram : shitadevani
Path : shitadevani
Snap chat : shitadevani
Ask fm : shitadevani
Line : shitadevani

Sekian dan terimakasih :)
XII IPA 1/ 34/ Shita Devani


Tugas TIK

TUGAS 1
Kesan dan Pesan selama bersekolah di SMAN 2 Denpasar

Kesan :
Hmm... kesannya biasa aja sih.... wkwkwk, gak lah.... Resman tu sekolah yang paling asik sedunia. Walaupun sekolah ini cukup ketat tapi kita bisa dengan enjoy menjalaninya. Apalagi untuk kelasku, paling banyak dapet dispen..... hahaha
Bangga juga menjadi salah satu bagian dari Resman. Mungkin banyak yang menilai Resman itu hanya negatif saja, tapi orang orang itu salah. Resman adalah salah satu sekolah yang sangat berprestasi, baik di bidang akademis maupun non akademis. Contohnya: baru baru ini Resman mendapkan juara umum II porjar 2014. Makasi juga buat guru guru resman yang udah ngajarin kita walaupun kita bandel, gak bisa di kasik tau, kalo ulangan remidi terus tapi mereka tetep sabar ngadepin kita.

Pesan : Saya berharap bangunan didepan kelas saya ini cepet sesai. Debunya itu lo pak, kemana-mana.... kalo markir motor jadi agak ribet gara-gara banyak ada batu -_- wkwk (Just Kidding).
Semoga resman bisa semakin maju, bisa mencetak lebih banyak prestasi lagi dan bisa go International! oiya hotspot wifi agak rada-rada nih di kelas saya pak..... -_-


I LOVE RESMAN !!!!! I LOVE SCOFER!!! (SCIENCE ONE FOREVER ^^)

Sabtu, 08 Desember 2012

Replacing Blogger widget’s title with an image

If Google brought you here, then you might quickly realize that the gadget/widget titles in the screenshot are not actually titles. They are images, occupying the title slots .
Why do some people put images there when they can do it with texts? Well with text, you only have limited choices of fonts and styling. If you want to use a unique font or styling like in the screenshot, then text image is the only way to go. You can make the a title using a graphic software or using an online graphic generator. I made the title at CoolText.com).
Okay back to the tutorial. So how do we go about replacing a Blogger widget title with an image? Here’s how:
  1. Login to your to your Blogger account.
  2. Go to Dashboard > Design > Edit HTML.
  3. Back up your template.
  4. Tick the  Expand Widget Templates checkbox on top right of the HTML window.
  5. Use Ctrl+F to search for the gadget title (that you want it replaced with an image) in your HTML code. For example for my translation gadget, the title is “Translate This Page”, so I enter title='Translate This Page' in the search box. You may find this set(or something close to this) of codes:

    <b:widget id='HTML1' locked='false' title='YOUR_GADGET_TITLE' type='HTML'>
    <b:includable id='main'>
    <!-- only display title if it's non-empty -->
    <b:if cond='data:title != &quot;&quot;'>
    <h2 class='title'><data:title/></h2>
    </b:if>
    <div class='widget-content'>
    <data:content/>
    </div> 
    <b:include name='quickedit'/>
    </b:includable>
    </b:widget>
     
  6. Replace the data tag <data:title/> with an image tag:
    <img src="YOUR_TITLE_IMAGE_URL" alt="YOUR_GADGET_TITLE"/>
    where YOUR_TITLE_IMAGE_URL is the link to your image file.
  7. Preview before saving.
  8. Enjoy!
Note: This method won’t work on a Followers gadget. As a workaround, you can put the title image in a Picture gadget. Then place the gadget above the Followers gadget. And make sure you leave the title box of the Followers gadget blank.

source : http://www.bloggersentral.com/2009/11/replacing-blogger-widget-title-with.html

Auto hide Navigation Bar (Navbar)

Auto hide works is, when the visitor point his mouse to top page, Navbar will appear. Otherwise, if visitor point his mousedown (not in Navbar area), automatically that Navbar will disappear.

How to place it:

Find out body { code in Edit HTML page. Then, insert code below right before body { code:

#navbar-iframe{opacity:0.0;filter:alpha(Opacity=0)}
#navbar-iframe:hover{opacity:1.0;filter:alpha(Opacity=100, FinishedOpacity=100)}


 Good Luck!
source :
http://blog.zoomtemplate.com/auto-hide-navigation-bar-navbar-for-blogger.html

Writing HTML Code on your Article / menampilkan code html pada postingan blog

Hi. This is a very simple tips but it's very usefull to apply. Well, if you have a blog about computer/ internet like mine, you must be ever write an article that enclosed a HTML or JavaScript code. But, unfortunately when you post it, your written code doesnt appear as you want. Oppositely, it appears as a gadget/ preview that has been translated to HTML language. Don't worry, because here I will give you a nice trick to avoid it. Here they are...
write html code article post

For example, you want to make an article titled "How to Add Clock Gadget on Blog". Then, of course in your article, you'll enclose the HTML/ JavaScript code that should be copied by your reader. But, when you agree to publish it, you'll see that your code has changed into the real gadget (in here is clock gadget). So, the reader won't be able to follow your tips, isnt it..??

This simple thing should be mentioned by some blogger. Because of that, here i have some trick to enabling visitor's HTML copy-paste. They are:


1. Using http://centricle.com/tools/html-entities/
write html code article post
This site can change (encode) your HTML code into other code that can be appeared as text in your post.

Firstly, go to
http://centricle.com/tools/html-entities/
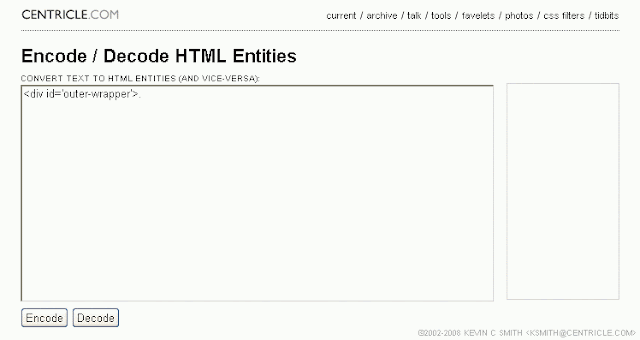
Then, you'll get the following preview:
write html code article post

In there, copy and paste your HTML code into the field. Then, click Encode.
After that, copy and paste the code into your post. Finished.

2. Using text area.
http://t0.gstatic.com/images?q=tbn:ANd9GcSmofj_bvDksmGV_u7BzSe_mlxj9QR-EYQQrNt8vQ1P0lfgvBAsD-eoacLA
Text area is used for putting some text, include HTML code, so that it will be in different place and will be able to be copied by your article readers.
To make Text Area is very easy. Just copy and paste the following code:


<div><form name="copy"><div align="center"><input onclick="javascript:this.form.txt.focus();this.form.txt.select();" type="button" value="Highlight All"> </div><div align="center"></div><p align="center"><textarea style="WIDTH: 300px; HEIGHT: 144px" name="txt" rows="100" wrap="VIRTUAL" cols="55">YOUR_HTML_CODE</textarea></p></div></form>

Then, change the text: YOUR_HTML_CODE , with your HTML code.
To change the width and height, just set the number on: "WIDTH: 300px; HEIGHT: 144px"

Then, publish your post.


Finally, just try one of the trick above. I have used those way to show HTML code in my article and it works. :)

P.S: If you have another better way, please give some comments below.

AND...NOW, I KNOW...!!!


(c) Written by: Nanda Firsta
Source:http://nandafirstboy.blogspot.com/2011/02/writing-html-code-on-your-article.html

Kamis, 06 Desember 2012

I've got korean fever . . .

Hallyu contemporary cultures virus that resulted in "Korea fever" has been infecting Indonesia in the past decade. Hundreds of titles drama, pop music, series, movies, video games, to B-Boy Korea smelled played and displayed on television screens Indonesia in recent years.

Korean in Indonesia has become the center of attention. many of the teens who started anesthetized by a hair style, clothing styles, and Korean music. even many of those who are willing to visit the country producer of ginseng is to directly see their idol appearance.

I've got korean fever beacause my friend (karina) showed me a video of EXO (B-Boy korea).
Maybe u want to see a video of EXO (What is love)


What do u think? have u got korean fever too? haha
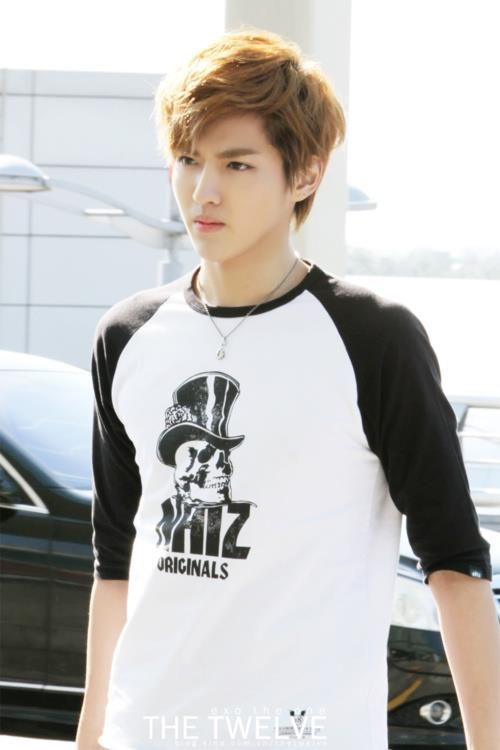
My idol in EXO K is KAI and in EXO M is KRIS.
I will share u about their bios

EXO K


Real Name: Kim Jong In 김종인
Stage Name: Kai
Date of birth: January 14th, 1994
Position: Main Dancer, Lead Rapper, Vocalist
Height: 182 cm
Blood Type: A
Skills/Hobby: Ballet, Jazz, Hiphop, Popping, Locking dances

EXO M


Real Name: Wu Fan 吳凡
Stage Name: Kris
Date of birth: November 6th, 1990
Position: Leader, Lead Rapper, Sub-Vocalist
Height: 187cm
Blood Type: A
Skills/Hobby: English, Mandarin, Korean, Cantonese, Basketball 

They are so cute, right ?
KAI or KRIS ??


Rabu, 05 Desember 2012

Blog Tutorial

Navigation Bar with Images


A navigation bar with images looks like this:

Having important links in one place is a great way for readers to find what they’re looking for on your blog.  Common links found on navigation bars include “About Me” pages, posts with contact information, or even links to your other blogs.  So let’s get started!

Step 1: Decide what links you want to include on your navigation bar.  Find and copy the links to these locations.  For example, I want to include the following information:
-       Home: http://kreatedbykelsey.blogspot.com
-       About Me: http://kreatedbykelsey.blogspot.com/p/about-me.html
-       My Portfolio: http://kreatedbykelsey.blogspot.com/p/portfolio.html

Step 2: We need to create our images.  To do this, we’ll need some sort of editing program.  If you don’t have a purchased program such as Photoshop, there are many free options that will work great for our purposes!  My personal favorite is Gimp, but you can use anything from Picnik to your basic Paint program.
How big or small you make your images is really up to you.  I like to make mine somewhere between 30 pixels and 50 pixels in height.  One thing to consider is how many images you plan on using.  For example, if you have many links you want to add, your images will need to be a little bit smaller in order to fit.  The size of your images may be something that you need to play around with!

Step 3: Once you’ve created images that you’re happy with, save them to your computer as either .jpg, .png, or .gif files.

Step 4: Now that your images are saved, we need to upload them to the internet!  I use Photobucket.  If you don’t have an account, follow their simple directions to create one.  Once you’ve logged into your account, click on “Upload Images and Video” and find the images that you just created and saved.

Step 5: After you’ve uploaded your images, click on each one until you see a screen like this:

Copy the Direct Link information for each of the links you uploaded.  I will refer to these links later on as the links to your images.

Step 6 : Copy the following HTML code exactly as it appears here.

<center><a href="LINK1 GOES HERE"><img src="IMAGE LINK1 GOES HERE"></a><a href="LINK2 GOES HERE"><img src="IMAGE LINK2 GOES HERE"></a><a href="LINK3 GOES HERE"><img src="IMAGE LINK3 GOES HERE"></a></center>
Step 7: Next we need to fill in the different parts of the code.  Let’s start with the first link.  In my case this is my homepage, http://kreatedbykelsey.blogspot.com.  I am going to replace the blue words LINK1 GOES HERE with this link.

Step 8: Now that I’ve filled in the first link, I’m going to fill in the image link.  In this case, I’m going to fill in the red words where it says IMAGE LINK1 GOES HERE with the link to my first image, http://i141.photobucket.com/albums/r75/kreatedbykelsey/Home.png.
My HTML now looks like this:

<center><a href="http://kreatedbykelsey.blogspot.com"><img src="http://i141.photobucket.com/albums/r75/kreatedbykelsey/Home.png"></a><a href="LINK2 GOES HERE"><img src="IMAGE LINK2 GOES HERE"></a><a href="LINK3 GOES HERE"><img src="IMAGE LINK3 GOES HERE"></a></center>

Step 9: Repeat steps 7 and 8 for the rest of the links you want on your navigation bar.  Depending on how many links you want on your navigation bar, we’re now going to have to dig a little deeper into the HTML…

Step 10: The original code I gave you in Step 6 is for 3 links.  However, if you want more links you will need to copy the following code for each additional link that you want to include:

<a href="NEXT LINK GOES HERE"><img src="NEXT IMAGE LINK GOES HERE"></a>


Step 11: After you’ve inserted all of the links and images you want on your navigation bar, we need to insert it underneath your header.  Go to your dashboard and click “Add a Gadget”.


Select HTML/JavaScript and paste your completed code into the box.  Make sure to leave the gadget title blank as shown in the picture below!


Step 12: Save it to your blog!  Let’s take a look at what the final product looks like…


You’re done!  Make sure to test out your links to see if they take you to the right places.

Source :
http://www.tipjunkie.com/lifestyle/tech/blogging-tips/blogging-101-navigation-bar-with-images/

Sabtu, 29 September 2012

our trip to HK :] enjoy

At 25 September 2012, me and my family going to HK. 
HK is a good city to see.. iam very enjoy at there. I want to go backl to HK :( 

My first day at HK.
I stay at Regal Airport Hotel. At night me and my family visit Citygate mall


Regal Airport Hotel


 at CityGate Mall


To be Continue...

Sabtu, 02 Juni 2012

Queen- Killer Queen(video with lyric, lyric and cover. Very like this song!

My favorite song. Enjoy :]


Lyric Queen-Killer Queen

She keeps Moet et Chandon
In her pretty cabinet
'Let them eat cake' she says
Just like Marie Antoinette
A built-in remedy
For Kruschev and Kennedy
At anytime an invitation
You can't decline

Caviar and cigarettes
Well versed in etiquette
Extraordinarily nice
Chorus


She's a Killer Queen
Gunpowder, gelatine
Dynamite with a laser beam
Guaranteed to blow your mind
Anytime

Recommended at the price
Insatiable an appetite
Wanna try?

To avoid complications
She never kept the same address
In conversation
She spoke just like a baroness
Met a man from China
Went down to Geisha Minah
Then again incidentally
If you're that way inclined

Perfume came naturally from Paris
For cars she couldn't care less
Fastidious and precise
Chorus


Drop of a hat she's as willing as
Playful as a pussy cat
Then momentarily out of action
Temporarily out of gas
To absolutely drive you wild, wild
She's all out to get you
Chorus

http://www.youtube.com/watch?v=o57xEVHrYvE&feature=fvst
http://lirik.kapanlagi.com/artis/queen/killer_queen

billbilly01's channel! Very cool!

Are u boring? you must watch these videos! He is very cool! very entertaining!
And don't forget to subscribe his channel on youtube! http://www.youtube.com/user/billbilly01

Schoolyard :]

These are my photos with my classmates in the schoolyard. Really miss you guys! :(

with my best friend, Ayu Chintyana Dewi ;]

1. Babe  & reyhan
2. Reyhan
3. Nadya
4. Ozbec & awang

1. Nenty, sinta & naura
2. Naura, sinta, riska & nenty
3. Nadya & adel

1 & 2. Ozbec & Ardi
3. Ozbec & awang
4. Babe & 98's flag
5. Krisna & 98's flag

This kite is made by our class. The name of this kite is "Layangan Kreasi"

Kamis, 31 Mei 2012

Moymoy palaboy

Watch these videos! This is my favorite video. Very entertaining! You must subscribe their channel. Enjoy:] http://www.youtube.com/user/moymoypalaboy


About me


Just a few simple things that you may not know about me.

♥♥  My name's shita devani, you can call me tata

♥♥  I was born on the 21th of June, 1997 at Denpasar.

♥♥  I am the eldest child in my family and I've got a little brother (Deva)

♥♥  I have always enjoyed singing and playing internet everytime

♥♥  I'm obsessed over pastel colors, pretty-cute-vintage stuff

♥♥  I love to eat or making cake, pizza, steak, but pizza especially. :)

♥♥  I love simple things in life

♥♥  I loved to watching movies, especially Korean dramas. And I really dont like horror movies

♥♥  I'm officially single. I'm still too young and for right now, my future is my priority.


Mengubah judul gadget di blog dengan gambar


Setelah kemarin saya posting tentang modifikasi kotak komentar part-1, kali ini saya akan posting lagi tentang modifikasi template, tapi bukan di kotak komentar, tapi modifikasi di bagian sidebar yaitu "Mengubah judul gadget di blog dengan gambar". Coba sobat lihat di blog sobat, judul gadget blog sobat pasti berupa teks, lha dengan cara ini nanti kita akan ubah teks tersebut menggunakan gambar. Tentunya gambar tersebut juga harus berupa judul gadget untuk memberi penjelasan kepada pengunjung gadget apa yang tersimpan di bawah gambar tersebut.

Biar gak bingung, saya kasih gambar contohnya ya:
Judul gadget sebelum di modif :


Judul gadget setelah di Modif


Sobat sudah paham kan setelah lihat gambar di atas?
Untuk membuatnya, silahkan ikuti langkah-langkah berikut ini :
1. Login dulu di akun blogger sobat
2. Klik "Rancangan" => "Edit HTML"
3. Centang "Expand Template Widget"
4. Sebagai contoh, saya akan mengubah judul gadget "Site Info" dengan gambar. Maka untuk mencarinya saya akan mengetikkan "Site Info" dikotak pencarian (CTRL+F). maka hasil yang akan keluar akan seperti ini :


5. Untuk mengubah judul gadget dengan gambar, maka hapus kode


Dan ganti dengan kode :
URL GAMBAR YANG AKAN DIPASANG SEBAGAI JUDUL GADGET" alt="NAMA JUDUL GADGET"/>


6. Preview hasilnya
7. Kalau sudah berhasil, silahkan "Simpan Template"

Keterangan :
Untuk membuat gambar judul gadget, bisa sobat lakukan di Cooltext

Untuk Upload gambar, sobat bisa upload di Tinypic atau di Photobucket

Nama judul gadget, isi dengan judul gadget blog sobat. Sebagai contoh : judul gadget yang saya ubah menjadi gambar adalah site info. Sesuaikan dengan gadget yang akan sobat ganti


Semoga bisa menambah pengetahuan sobat.

http://muzzymusthofa.blogspot.com/2010/06/mengubah-judul-gadget-di-blog-dengan.html


Cara Pasang Box Twitter Status di Blog


I. Membuat dan Pasang Kotak Twitter di Blog Blogger Blogspot

1. Login ke Twitter.com dengan username dan password Twitter Anda.
2. Kunjungi twitter.com/about/resources/widgets/widget_profile [1]
3. Klik Finish and Grab Code dan Copy kode yang ada
4. Login/masuk ke Blogger.com -> Rancangan -> Elemen Laman -> HTML Javascript -> masukkan kode Twitter 
5. Simpan. Selesai.


II. Cara Bikin dan Memasang Box Twitter di Blog Wordpress.Com (versi Gratis)

1. Masuk ke Wordpress.com
2. Tampilan -> Widget -> Twitter 
3. Masukkan username Twitter Anda.
4. Simpan. Selesai.


III. Cara Buat dan Pasang Kotak Twitter di Blog Wordpress Berbayar (Hosting Sendiri)

1. Masuk ke situs Anda
2. Tampilan / Appearance -> Widgets -> Text
3. Masukkan kode javascript dari Twitter. 
4. Simpan. Selesai.

[1]: Di sini, Anda dapat mengedit tampilan seperti apakah memakai scrollbar atau tidak, background warnd dan jumlah tweet yang ingin ditampilkan di blog Anda.


http://www.alkhoirot.net/2011/07/cara-pasang-twitter-status-di-blog.html

Rabu, 30 Mei 2012

Cara membuat menu tab navigator horizontal


Sebenarnya pada banyak template baru, tab navigator horizontal ini sudah tersedia dan sobat dengan mudah bisa mendownloadnya dengan gratis dan tidak perlu susah membuatnya. Tapi bagi sobat yang tidak ingin untuk mengganti template baru lagi dan belum memiliki tab navigator horizontal pada headernya, berikut cara membuatnya:
1.Langkah Pertama
Loggin ke blogger
Pada dasbor klik tata letak
klik edit HTML kemudian cari kode ]]>
kemudian letakkan kode berikut diatas ]]>
menuhorisontal{width:100%; overflow:hidden; border-bottom:0px solid #DF0101;}
.menuhorisontal ul{margin:1; padding:0; padding-left:0px; font:20px Arial; list-style-type:none}
.menuhorisontal li{display:inline; margin:0}
.menuhorisontal li a{float:left; display:block; text-decoration:none; margin-right:9px; padding:4px 4px 4px 4px; color:#DF0101; background:#F8E0EC;}
.menuhorisontal li a:hover{color:#8A0808; background:#FBEFF5}

hasilnya seperti ini:
tab menu navigator horizontal
atau kode berikut:
.menuhorisontal{width:100%; overflow:hidden; border-bottom:0px solid #DF0101;}
.menuhorisontal ul{margin:1; padding:0; padding-left:0px; font:20px Arial; list-style-type:none}
.menuhorisontal li{display:inline; margin:0}
.menuhorisontal li a{float:left; display:block; text-decoration:none; margin-right:9px; padding:4px 4px 4px 4px; color:#DF0101; background:#F8E0EC;-moz-border-radius-topleft:15px;
-moz-border-radius-topright:15px;
-moz-border-radius-bottomleft:15px;
-moz-border-radius-bottomright:15px}
.menuhorisontal li a:hover{color:#8A0808; background:#FBEFF5}

Untuk hasil seperti ini
tab menu navigator horizontal
keterangan untuk angka margin, padding, font dan huruf bisa anda sesuaikan selera begitu pula dengan warna huruf dan backgroundnya. Untuk kode warna bisa lihat disini
Simpan template.
2. Langkah Ke Dua
Klik tata letak; elemen halaman; tambah gadget pada bagian atas header atau bagian bawahnya; HTML/JavaScrip
Copy kode warna merah pada web
http://amatullah83.blogspot.com/2009/12/cara-membuat-menu-tab-navigator.html
lalu paste di kolom html/javascrip

Warna backgroundnya silahkan sesuaikan dengan selera. Bisa lihat kode warnanya disini
Simpan. simpan lagi... lihat blog anda!
Semoga berhasil dan bermanfaat!

From : http://amatullah83.blogspot.com/2009/12/cara-membuat-menu-tab-navigator.html